What we're demonstrating
We're showcasing a simple layline.io Project which reads data from a file and outputs its contents into a Kafka topic.
To follow the showcase in a real setup, you can download the assets of this Project from the Resource section at the bottom. Read this to learn how to import the project into your environment.
Configuration
The Workflow
Outline
The workflow setup of this showcase was put together using layline.io's Workflow Editor and looks like this:
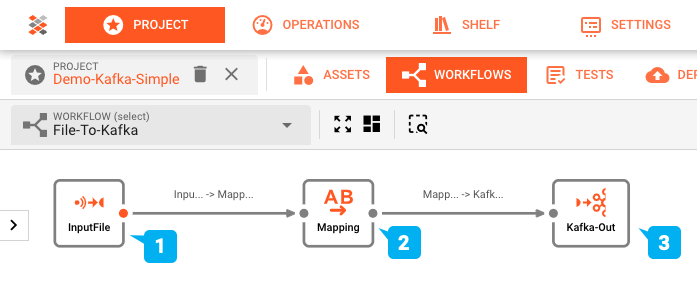
- (1) Input Processor: reading an input file with a header/detail/trailer structure, then
- (2) Flow Processor: mapping this into an output format, which is subsequently
- (3) Output Processor: written to a Kafka topic.
For the purpose of this showcase we are using a Kafka topic hosted by Cloud Karafka. So if you run the showcase yourself, you do not require your own Kafka installation.
Configuration of underlying Assets
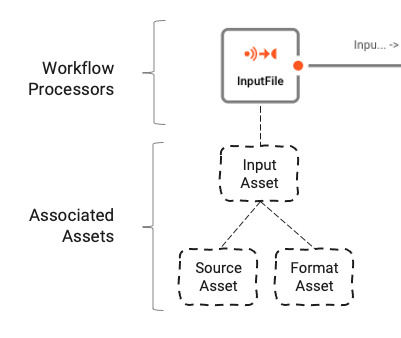
The Workflow is based on a number of underlying Assets which are configured using the Asset Editor. The logical association between Workflow and Assets can be understood like this:
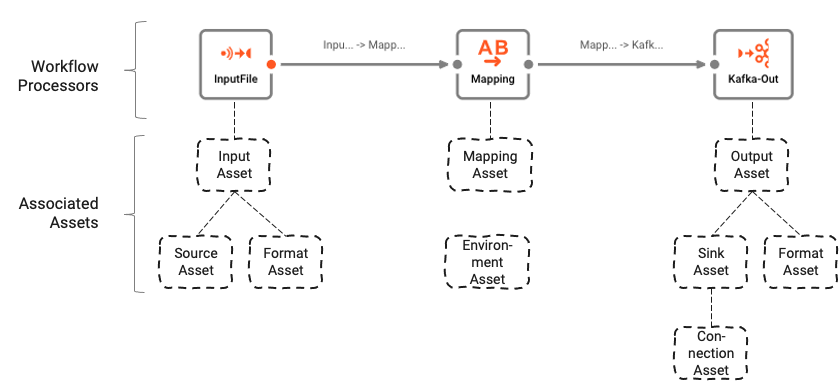
Workflows are comprised of a number of Processors which are connected by Links.
Processors are based on Assets. Assets are configuration entities which are of a specific class and type. In the image above we can see a Processor by the name of "InputFile", which is of class Input Processor and type Stream Input Processor. It in turn relies on two other assets "Source Asset" and "Format Asset" which are of type File System Source and Generic Format respectively.
In short:
- A Workflow is composed of interconnected Processors
- Processors rely on Assets which define them
- Assets can rely on other Assets
Environment Asset: "My-Environment"
First: layline.io can help manage multiple different environments using Environment Assets. This greatly helps when using the same Project in test-, staging-, and production environments which may require different directories, connections, passwords etc. We are using one Environment Asset (2) in this Project.
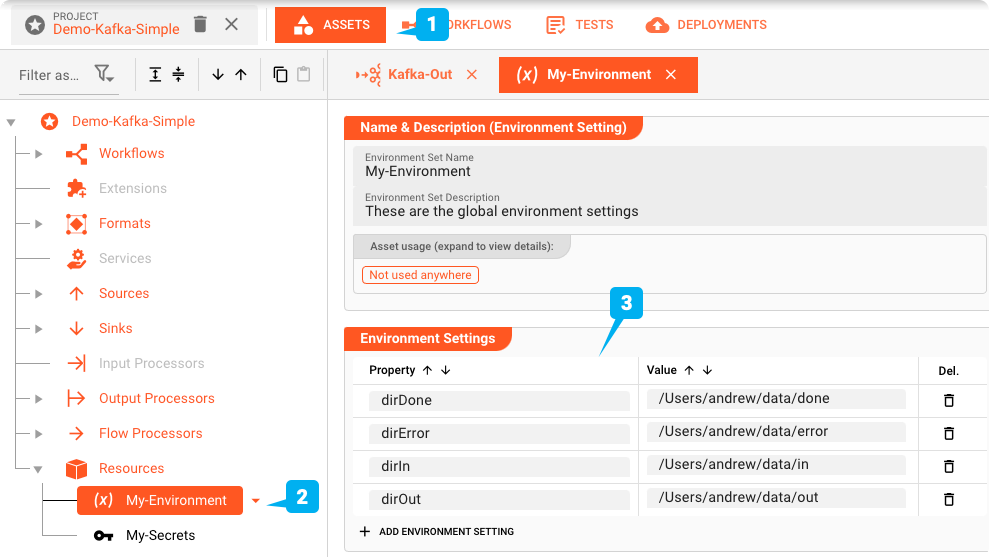
Variables like these can be used throughout the project by using a macro like ${lay:dirIn}. OS or Java system environment variables are prefixed with env: or sys: respectively, instead of lay:.
Stream Input Processor: "InputFile"
The Input Processor (name: InputFile / type: Stream Input Processor) takes care of reading the input files and forwarding the data downstream within the Workflow.
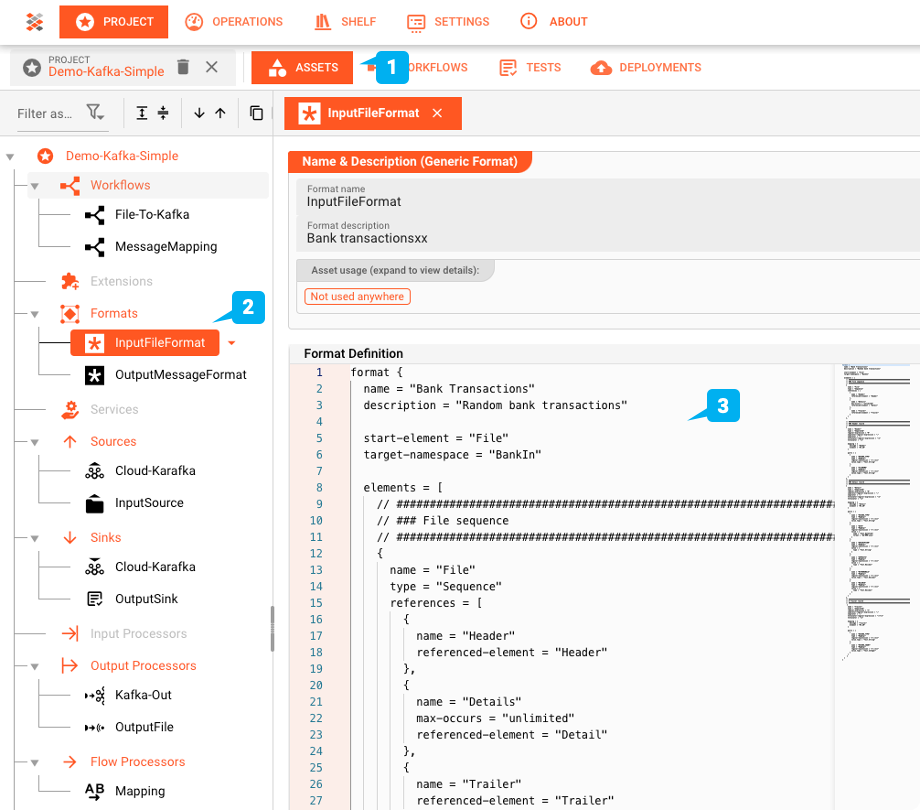
Generic Format Asset: "InputFileFormat"
layline.io provides the means to define complex data structures with its own grammar language. The file in our example is a bank transaction sample. It has a header record with two fields, a number of detail records holding the transaction details, and finally a trailer record.
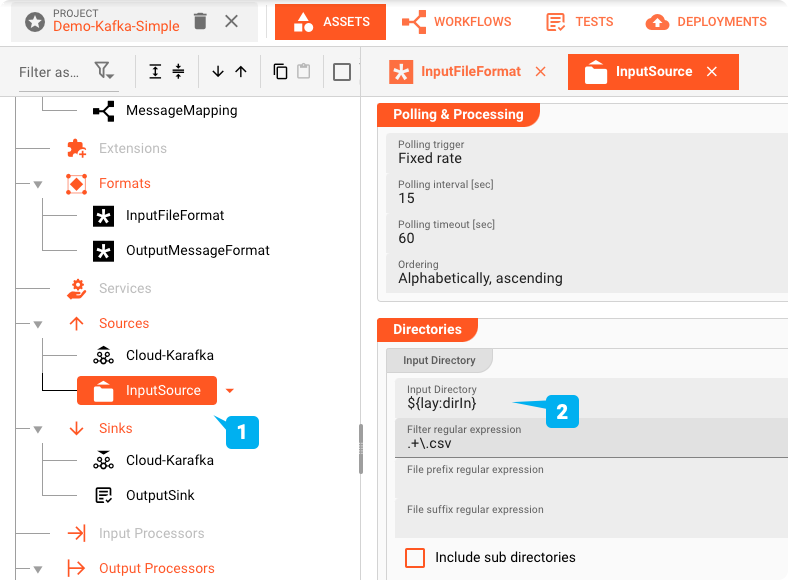
File-System-Source Asset: "InputSource"
The "InputSource" is an Asset of type File System Source which is used to define where the file is read from.
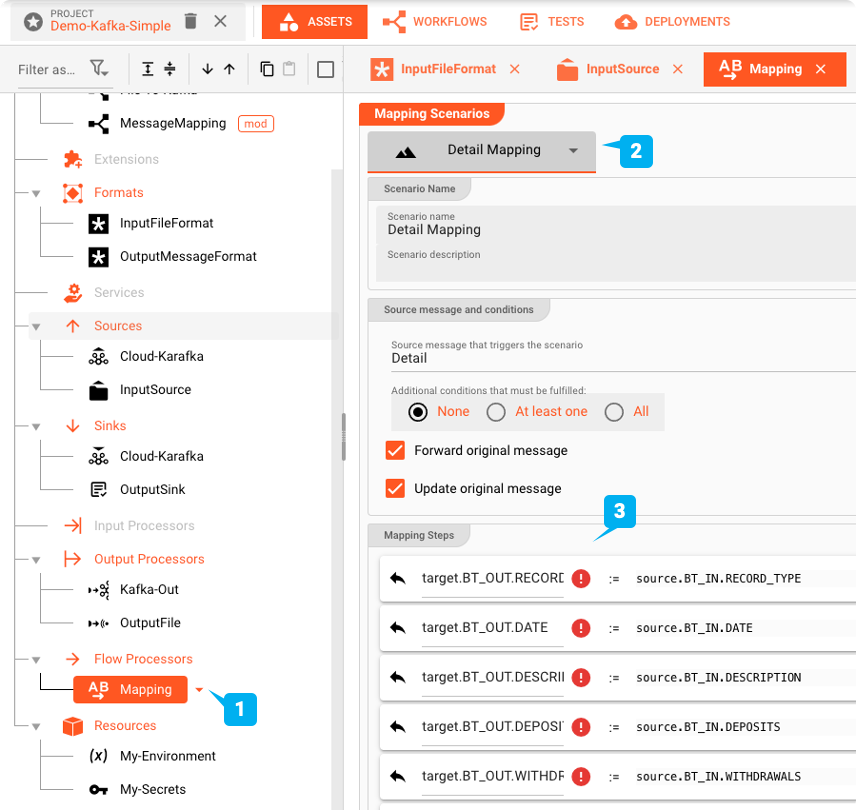
Flow Processor: Map
The Mapping Asset allows you to map values from the input to the output format.
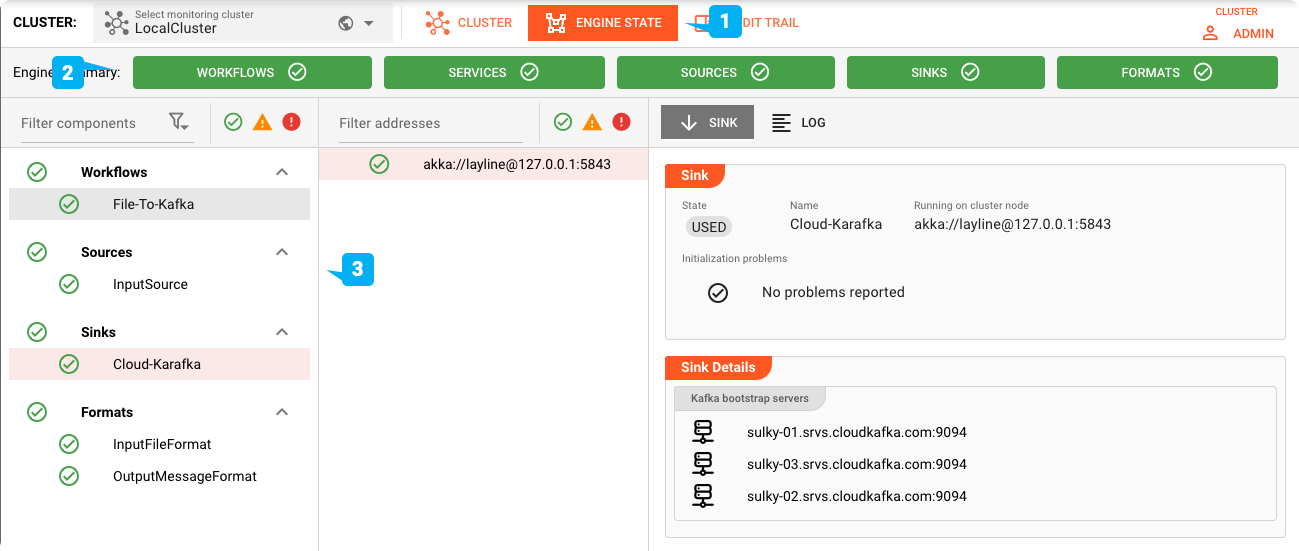
Stream Output Processor: Kafka
The last Processor in the Workflow is the Output Processor "Kafka-Out".
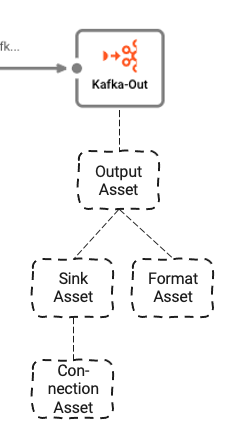
It depends on three underlying Assets:
- Output Asset: Defines Kafka topics and partitions we are writing to
- Kafka Sink Asset: The Sink that the Output Asset can use to send data to
- Generic Format Asset: Defines in what format to write the data to Kafka
- Kafka Connection Asset: Defines the physical Kafka connection parameters
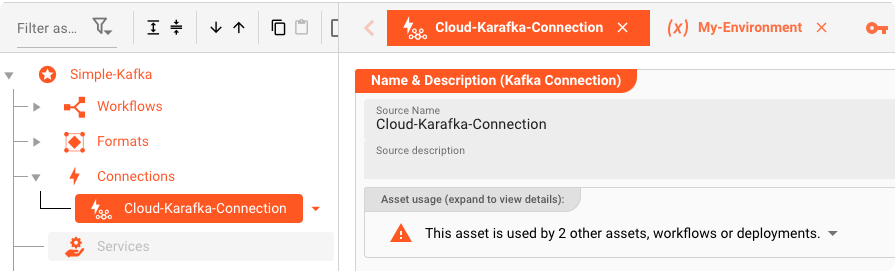
Kafka Connection Asset: "Cloud-Karafka-Connection"
To output to Kafka we first have to define a Kafka Connection Asset.
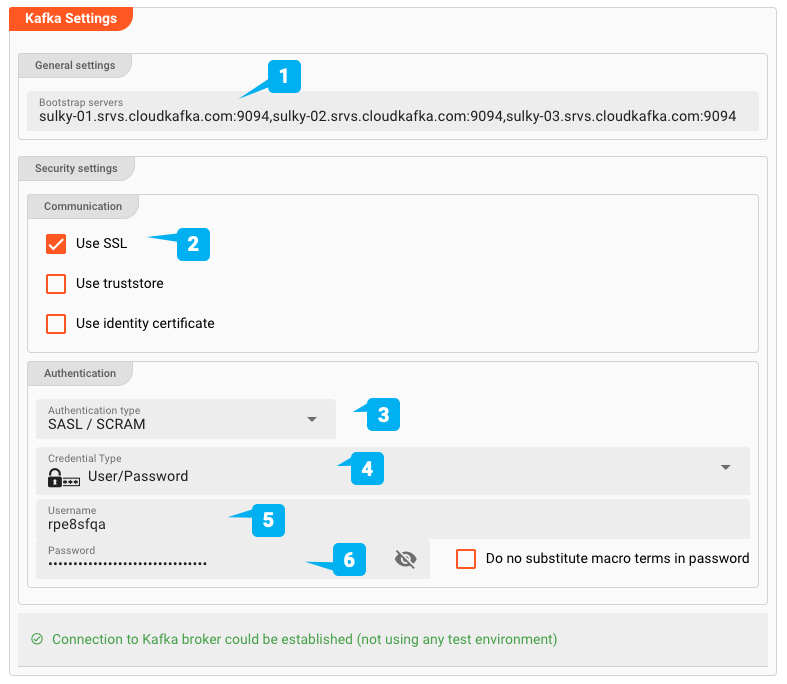
- (1) Bootstrap servers: The addresses of one or more Bootstrap servers
- (2) Use SSL: Defines whether this is an SSL connection
- (3) Authentication type: SASL / Plaintext, or SASL / SCRAM
- (4/5/6) Credentials: Username/Password
Deploy & Run
Transferring the Deployment
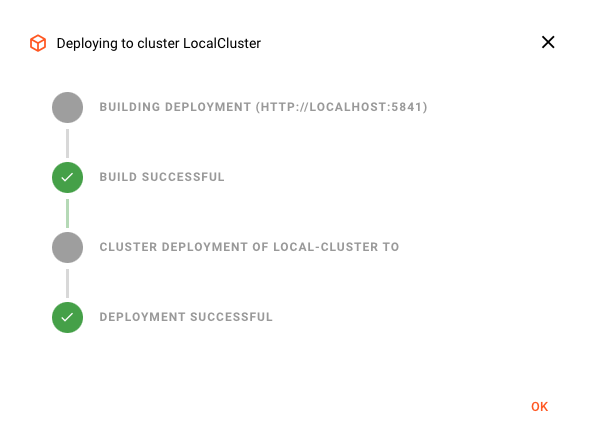
To deploy we switch to the DEPLOYMENT tab of the Project:
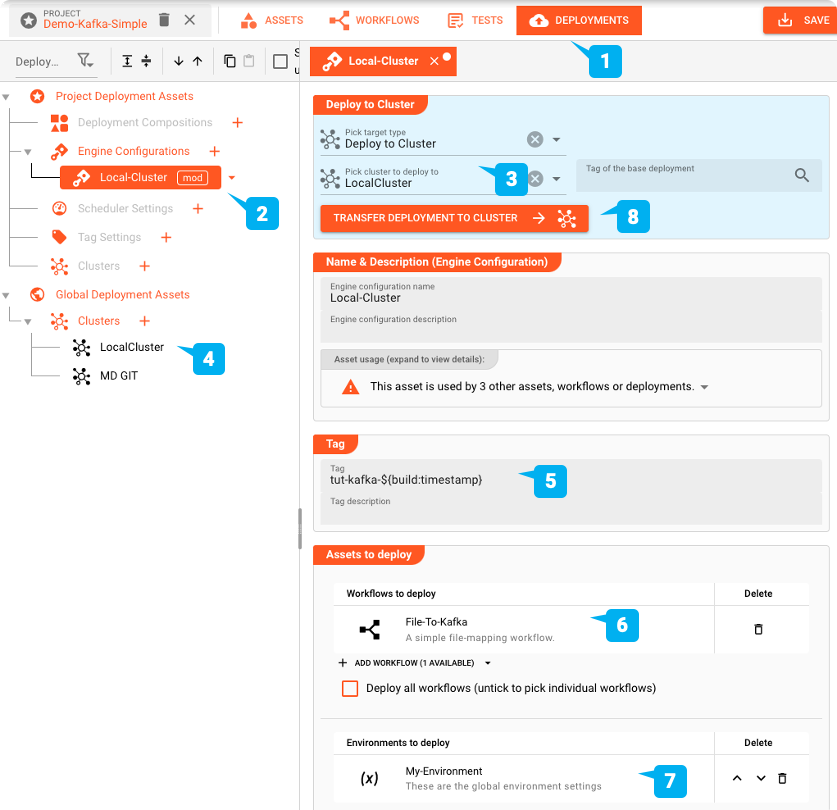
We create an Engine Configuration to deploy the Project. This defines the parts of the Project which we wish to deploy.
Activating the Deployment
We switch to the "CLUSTER" tab:
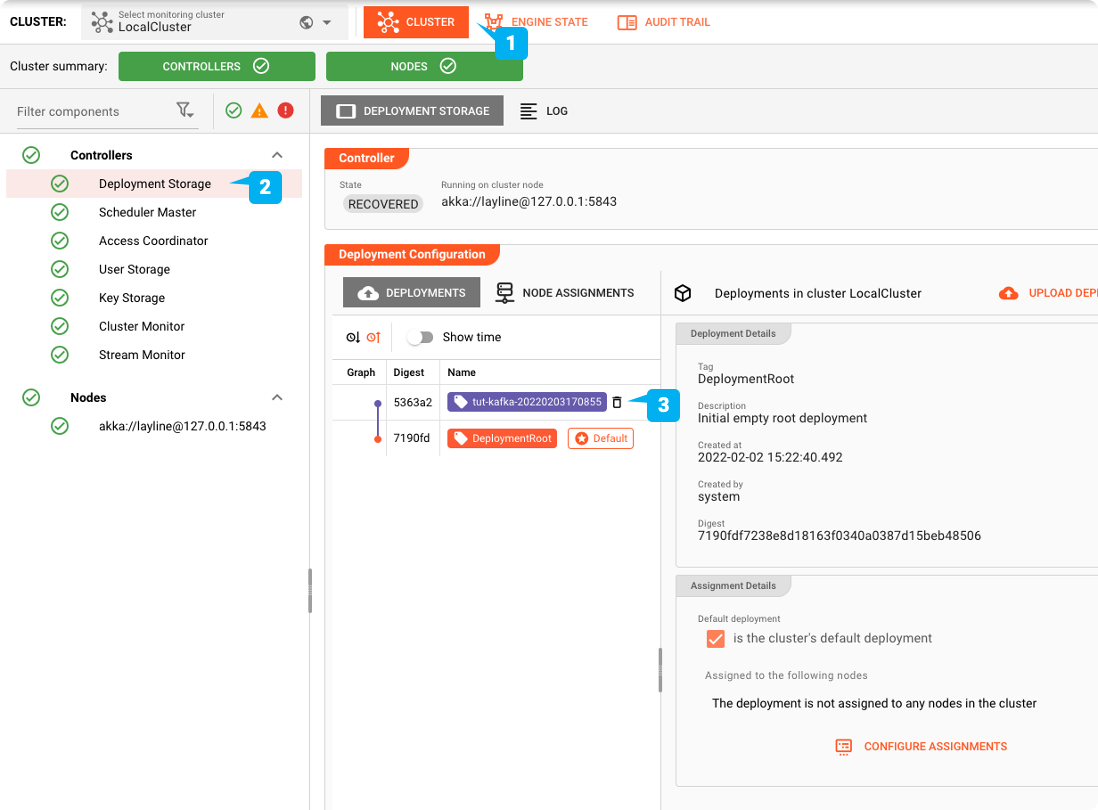
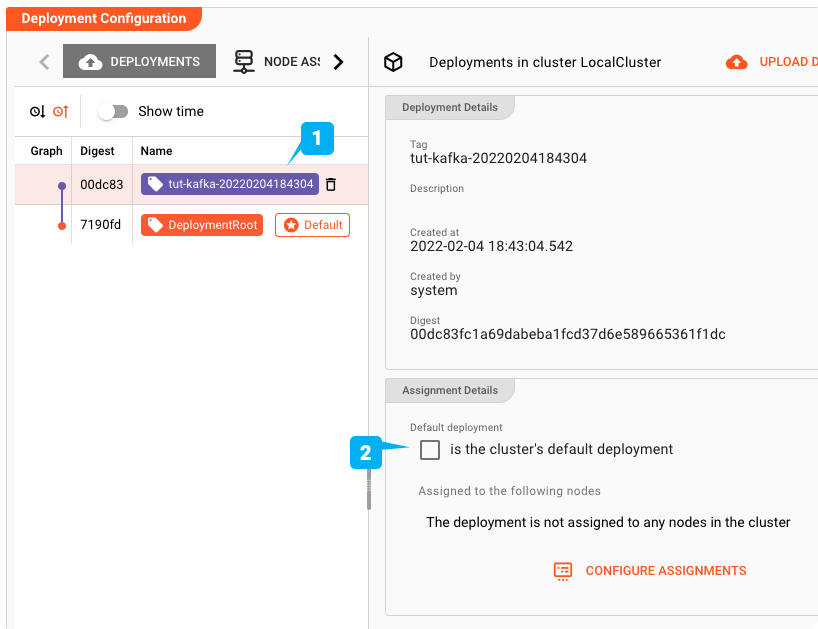
Make it the default Deployment
Schedule
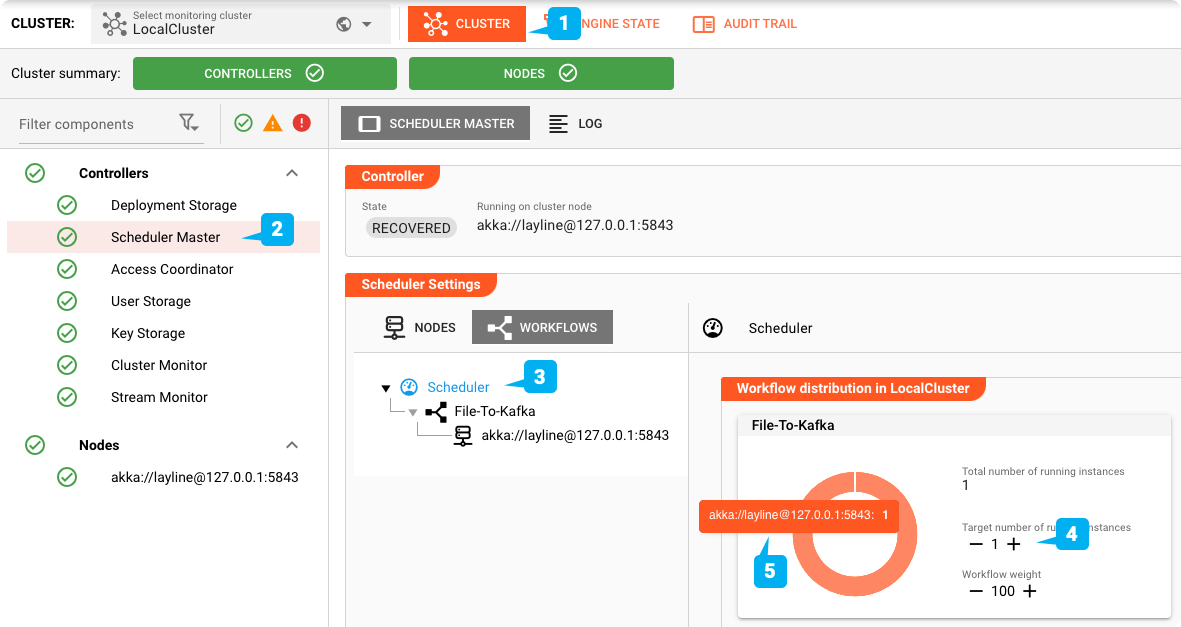
Engine Status
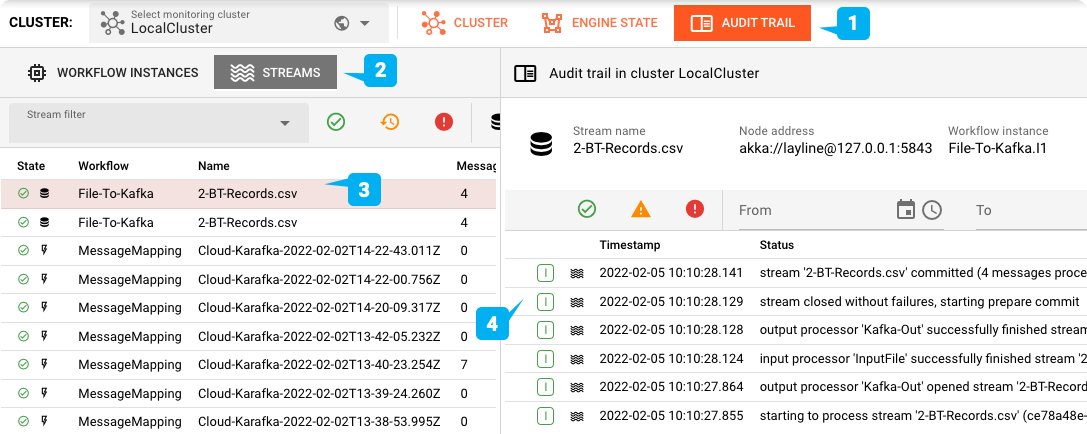
Feeding the test file
To test, we feed our testfile to the input directory which we have configured.
You can check the Cloud Karafka topic using a tool of your choice:

Summary
This showcase highlights how you can create a File-to-Kafka Workflow on-the-fly without a hassle. And you get a lot more with that out-of-the-box:
- Reactive — Embraces the reactive processing paradigm
- High scalability — Scales within one engine instance and beyond
- Resilience — Failover safe in distributed environments
- Automatic deployment — Deploy changed configurations with one click
- Real-time and batch — Run both using the same platform
- Metrics — Automatic metric generation for monitoring (e.g. Prometheus)
Resources
| # | Description |
|---|---|
| 1 | Github: Simple Kafka Project |
| 2 | input test files in the directory _test_files of the Project |
| 3 | Cloud Karafka credentials found in file cloud-karafka-credentials.txt |
| # | Documentation |
|---|---|
| 1 | Getting Started |
| 2 | Importing a Project |
| 3 | What are Assets, etc? |
- Read more about layline.io here.
- Contact us at hello@layline.io.